Configuring Virt-Manager
Adding your secondary GPU to the guest.
Screenshots are not fully updated yet to be specifically for this tutorial.
1. Removing the Virtual Display
First things first, we must remove the Display and Video devices from the left hand side in our Virt-Manager details window. As you can see here, they are now removed.
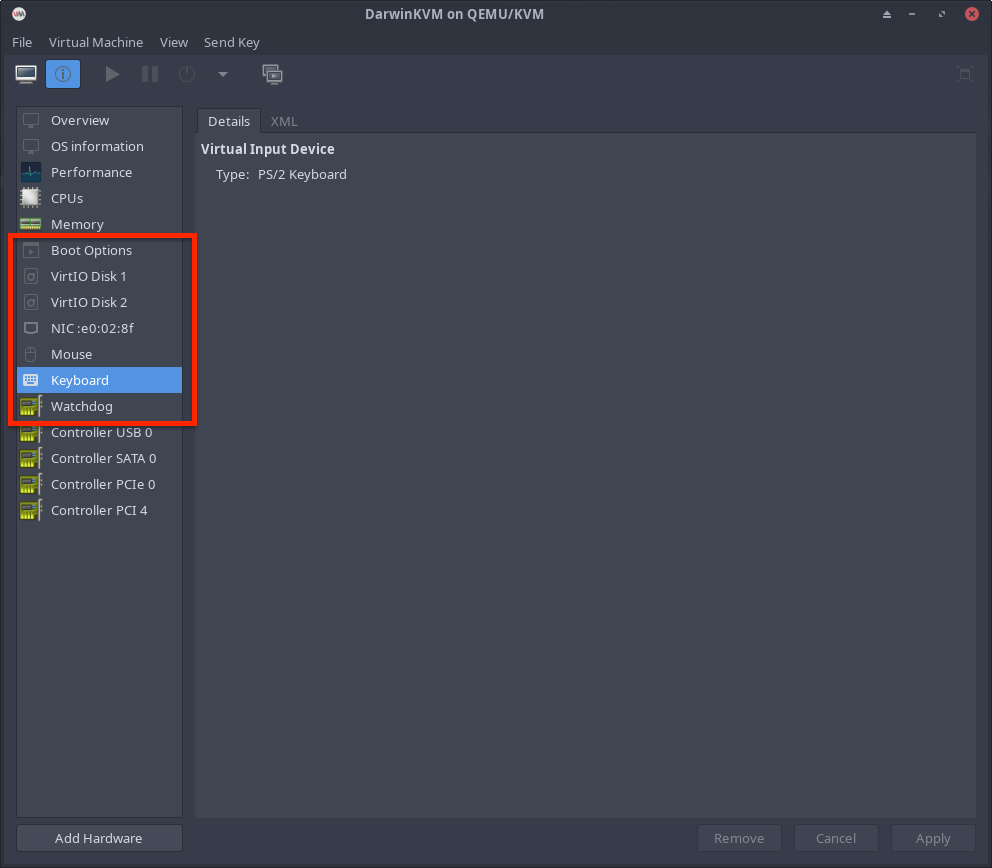
2. Removing Keyboard & Mouse
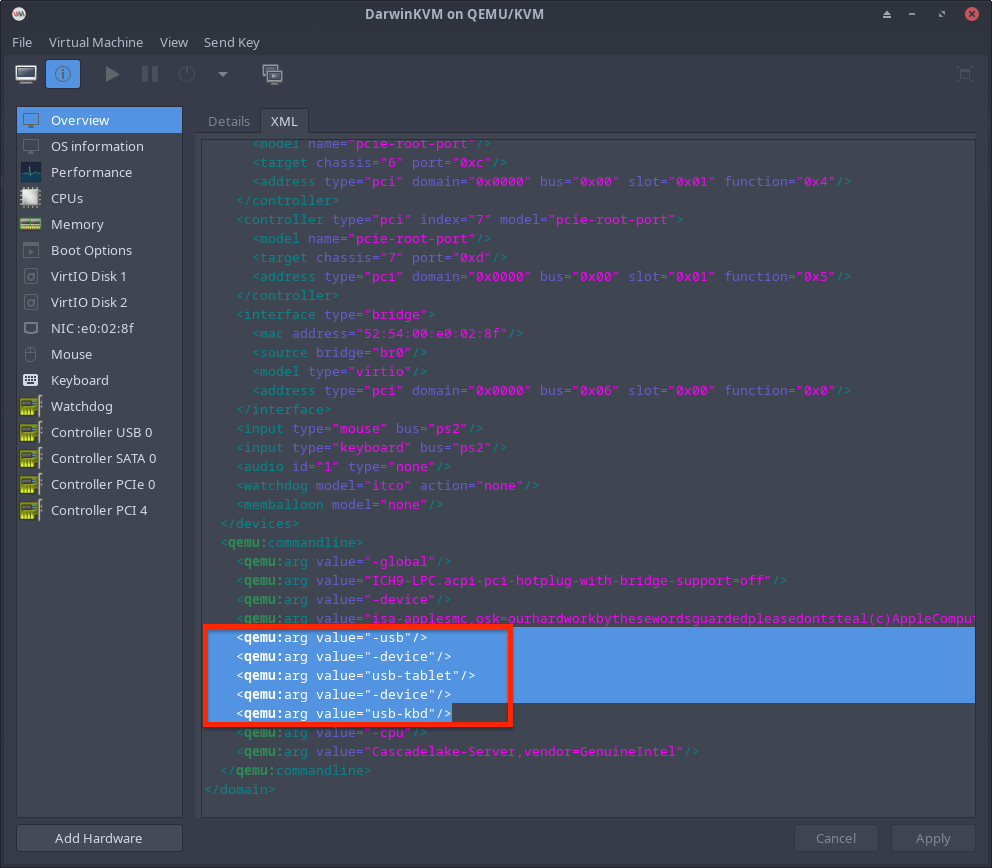
Now let's go ahead and remove the Keyboard and Mouse as we'll now be passing through our actual USB controllers later. You'll have to select the Overview tab on your left-hand side, and swap to the XML tab at the top. Scroll to the very bottom and delete the highlighted section. Be sure to hit apply!
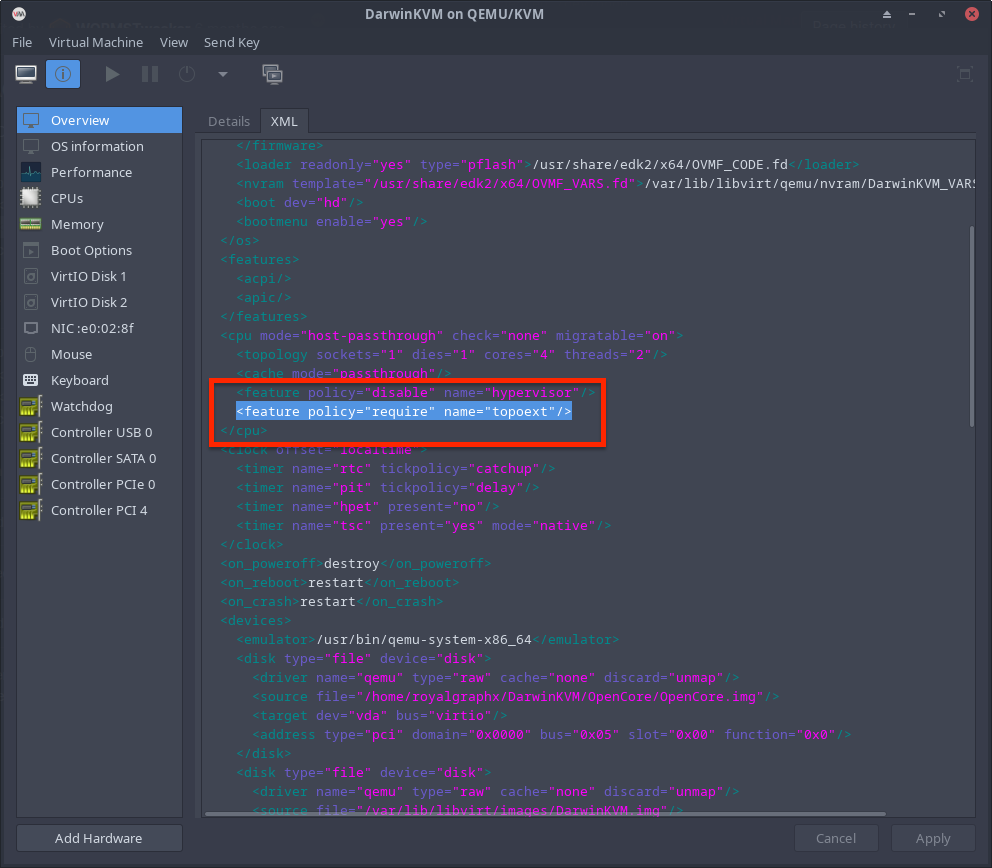
3. Enabling Topoext / AMD Simultaneous Multithreading (SMT) for Multithreading
If you have an AMD CPU, you should enable Topoext / AMD Simultaneous Multithreading (SMT) for the guest. This should already be applied, just double check the Dynamic XML did its job.
<feature policy='require' name='topoext'/>
4. IOMMU Groups
Now here's the tricky bit. You'll need to check your IOMMU groups. This can be done within the DarwinKVM Main Menu by selecting Option 3. This requires Sudo to use the command.
Sample Output, this is a host using Zen Kernel and ACS Patches. You will not get as clean groups as this output, you will see multiple devices within groups, you can only pass through devices in a group, if you can pass all the objects in the same entire group. This means that if your GPU and Ethernet are in the same group, you must pass through the entire group. This is where many people will run into issues. You can read more about this here
DO NOT ADD BRIDGES TO YOUR VIRTUAL MACHINE. That means devices like 03:09.0 PCI bridge [0604] do not count as devices in your groups that must be passed through. Only actual full devices.
IOMMU Group 21:
	03:09.0 PCI bridge [0604]: Advanced Micro Devices, Inc. [AMD] Device [1022:43ea]
IOMMU Group 22:
	04:00.0 VGA compatible controller [0300]: NVIDIA Corporation GF100 [GeForce GTX 470] [10de:06cd] (rev a3)
IOMMU Group 23:
	04:00.1 Audio device [0403]: NVIDIA Corporation GF100 High Definition Audio Controller [10de:0be5] (rev a1)
IOMMU Group 24:
	05:00.0 Non-Volatile memory controller [0108]: Samsung Electronics Co Ltd NVMe SSD Controller 980 (DRAM-less) [144d:a809]
IOMMU Group 25:
	07:00.0 Ethernet controller [0200]: Intel Corporation Ethernet Controller I225-V [8086:15f3] (rev 02)
If everything seems fine as it did the first time we determined viability, and you can pass your USB controllers, and Graphics card + it's audio without issues, you can move on.
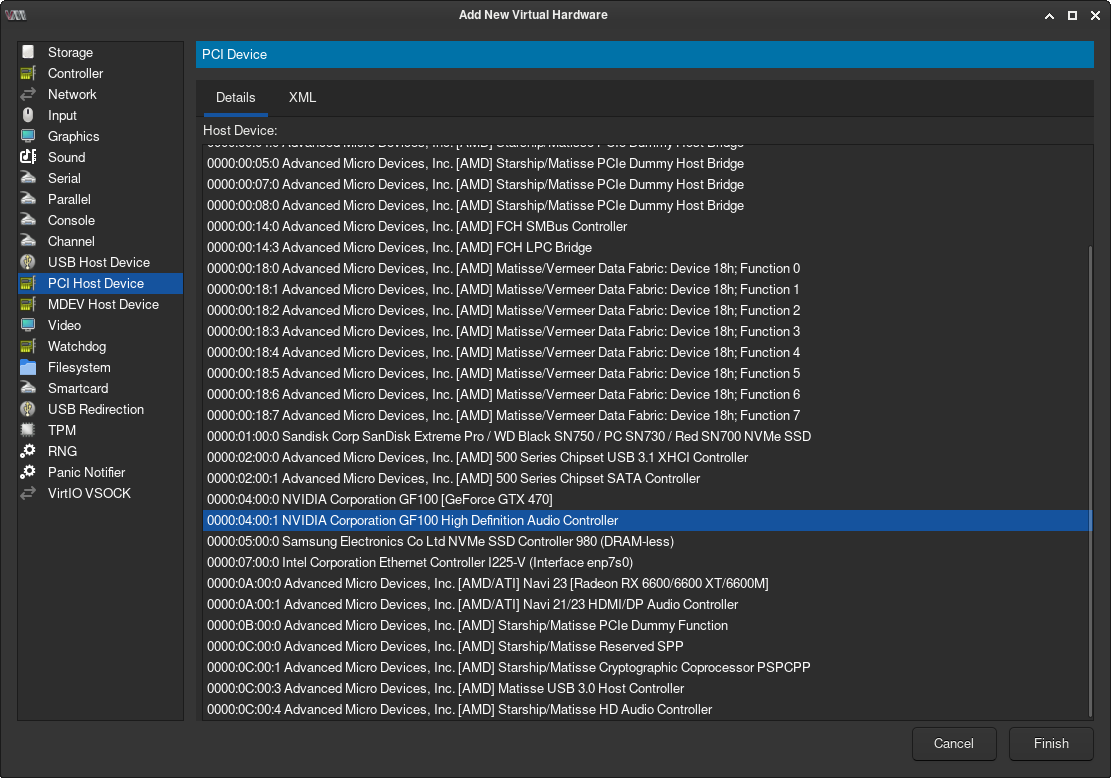
5. Adding GPU + Audio
Let's go ahead and add the GPU and its Audio to our Virtual Machine.
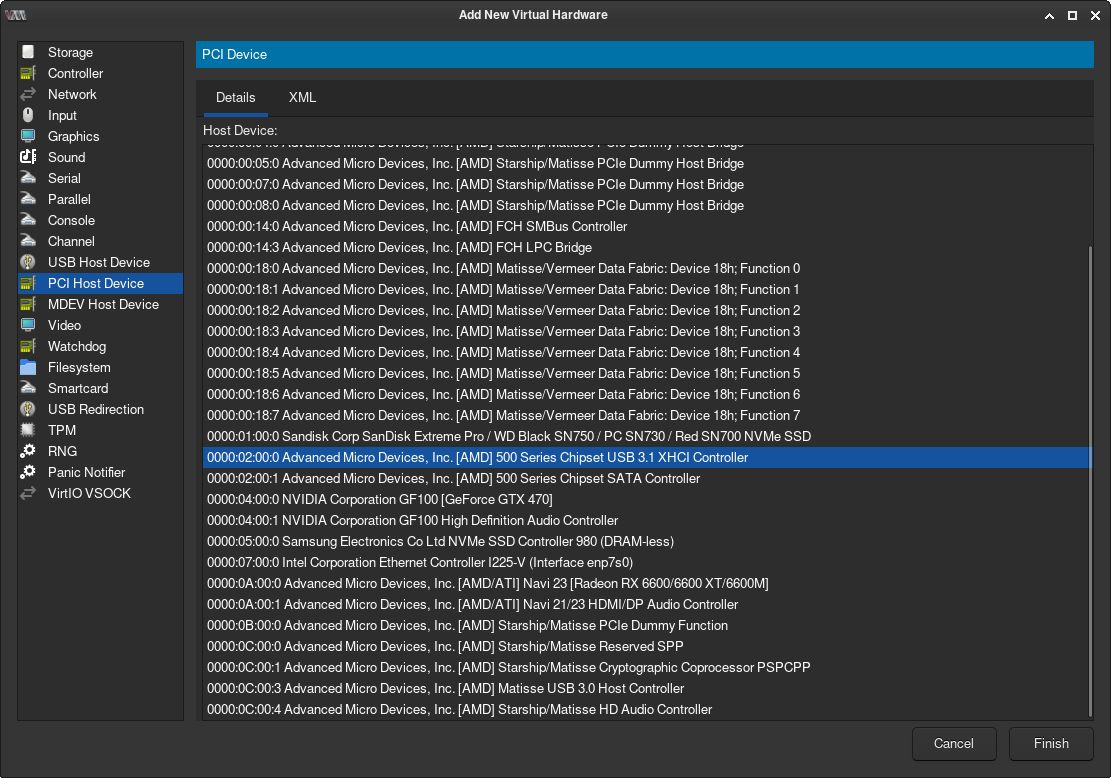
On the left-hand side, select the PCI Host Device section.
You can now scroll down and select your GPU device.

6. Correcting GPU Multifunction + Audio Bus
Here's what a lot of people don't check. This will be required here as on macOS if you want your HDMI/DP Audio to work, this must be configured correctly. Windows doesn't care so it's not an issue.
Essentially, your GPU and Audio must be on the same Bus in the Virtual Machine, but your Audio must be a Function of the GPU. Thus creating a multifunction GPU in the VM which has an accompanying Audio device. This displays the GPU as a single PCIe Device as it's supposed to be. Allowing for HDMI/DP Audio in macOS.
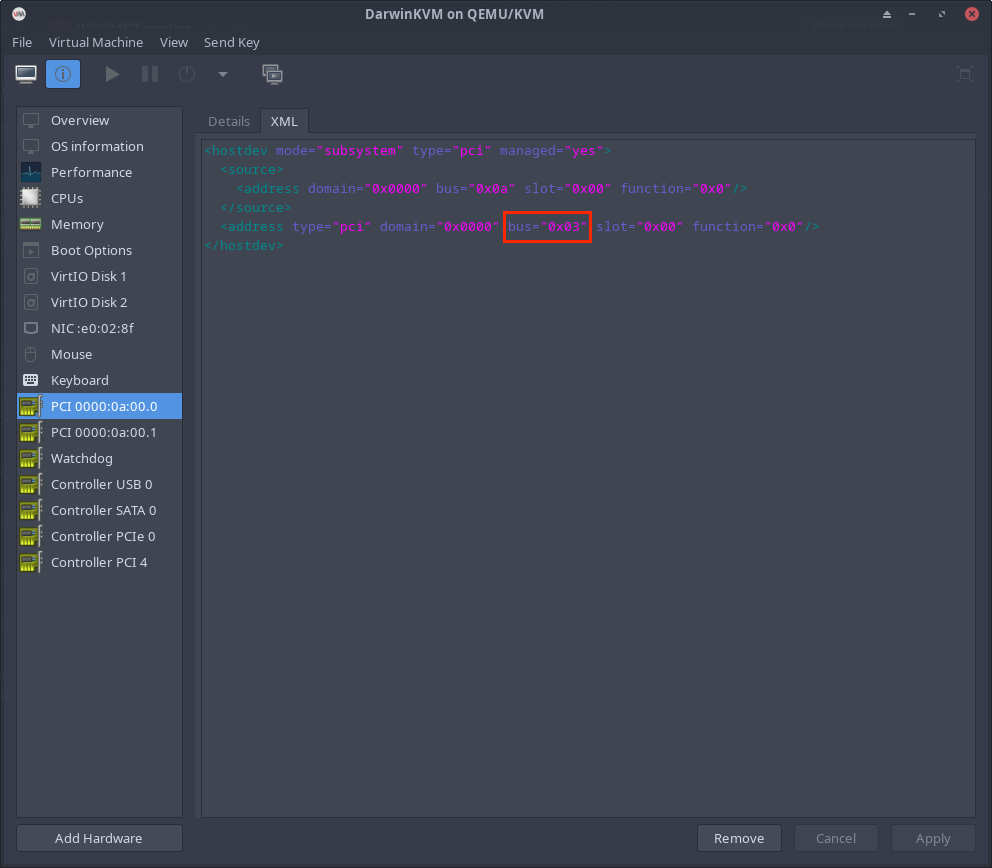
Go Ahead and select your GPU from the left-hand side. Note the Bus assigned by Virt-Manager when you added the device.
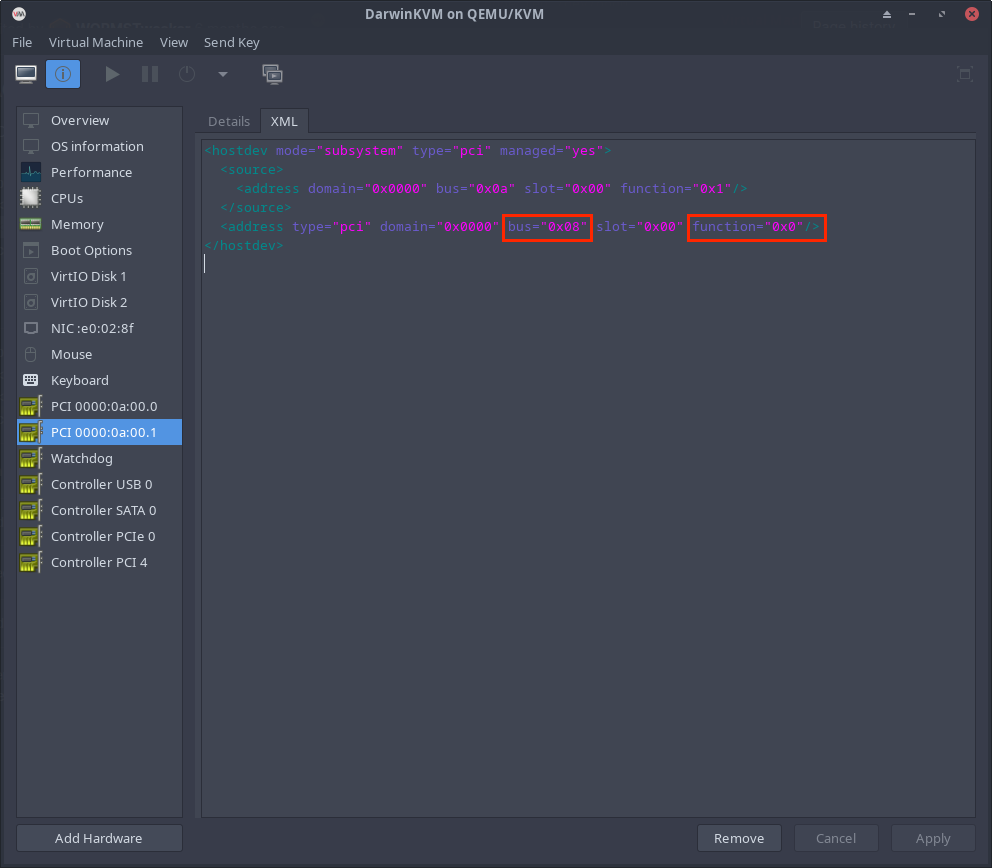
Go Ahead and select your GPU Audio from the left-hand side. Note the Bus assigned to this device does not line up with that which was assigned to the GPU. We will now correct it to the same value. You must also switch the 0x0 to 0x1 to assign the Audio as a Function of the GPU device before hitting apply.
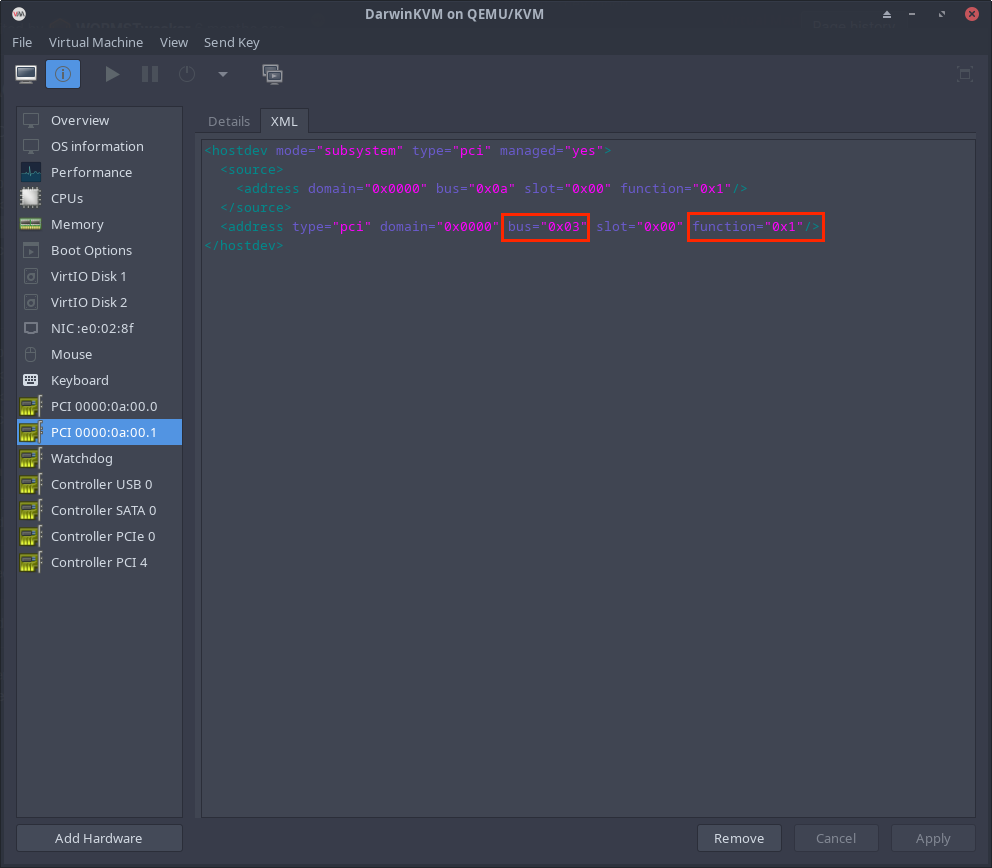
The corrected Audio device:
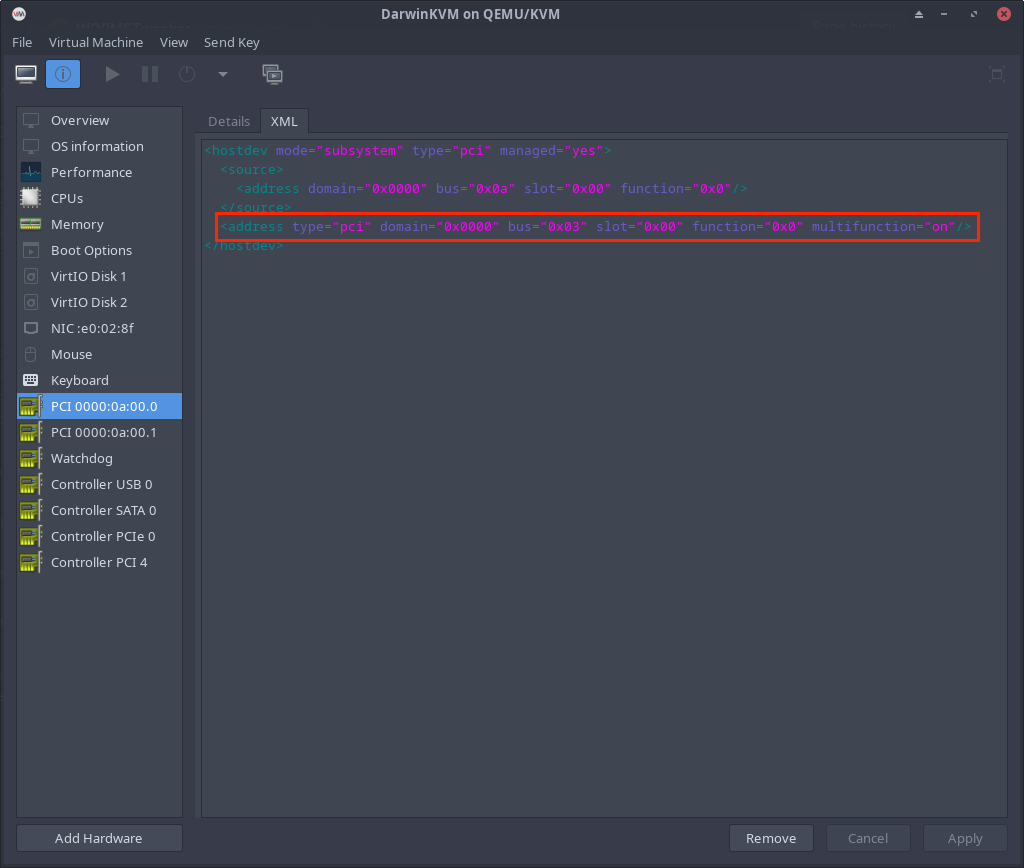
Now you can see the GPU is a multifunction device.
7. Adding USB Controllers
Go ahead and add a USB Controller as you'll need to use your Keyboard and Mouse now.
The ideal setup for passing through your keyboard and mouse, is by configuring Evdev. This is in a write-up, and you may or may not need to skip this step depending on your host hardware situation.

Example VM ready to start
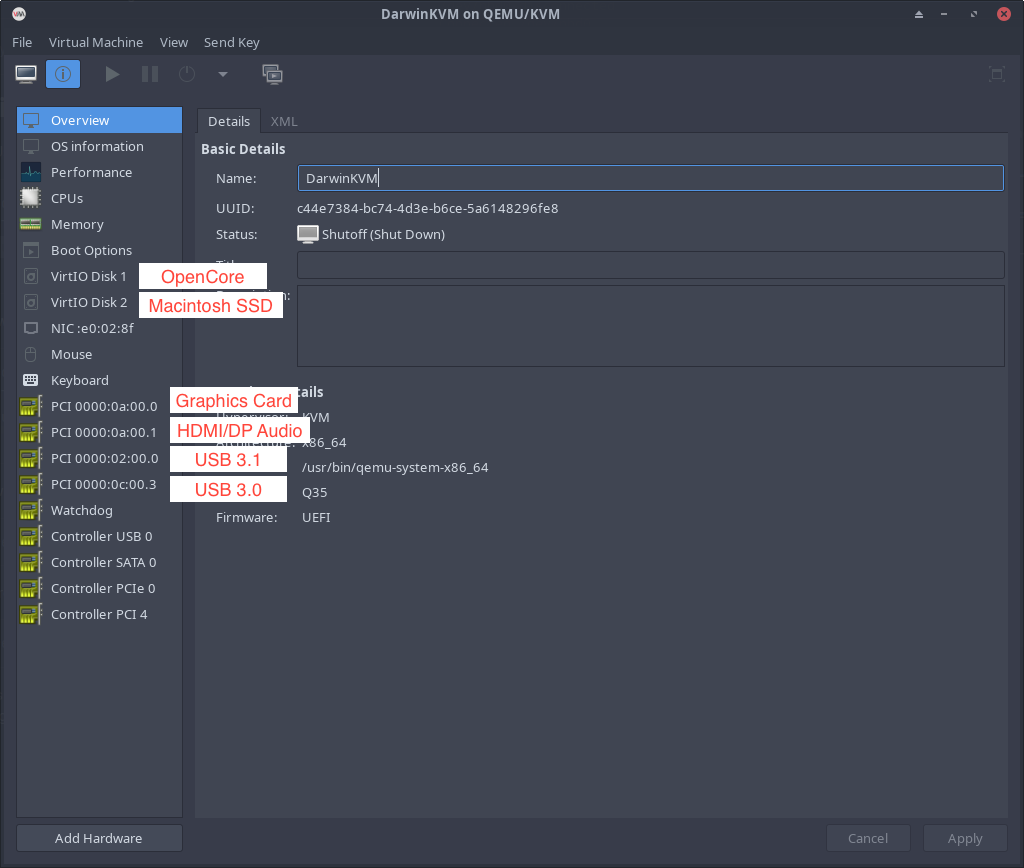
If you've gone ahead and verified everything, your IOMMU groups, and your multifunction GPU, you are now ready! Here's an example of what a completed GPU Passthrough Virt-Manager will look like. Note that in this example image, the BaseSystem.dmg is still included within the OpenCore image.