Configure Storage Drives
How to add the OpenCore Drive
This is a required disk. Your virtual machine must have the OpenCore disk image to find and boot any other OS X or macOS related installation content or disks.
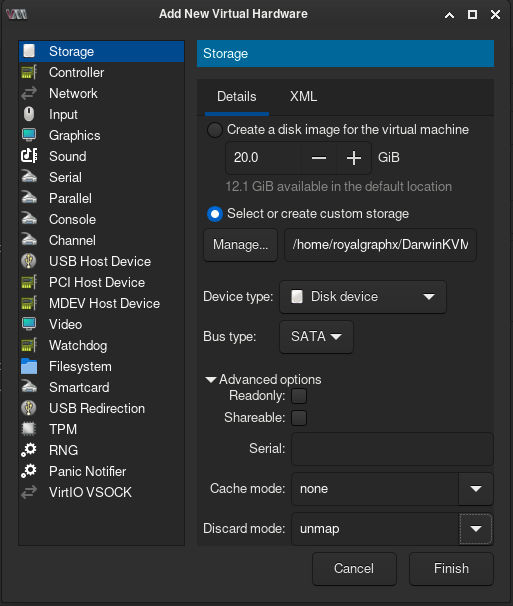
1. Select the Add Hardware button to bring up the Storage selection prompt.
2. Select the OpenCore image via the Manage... button. The Bus type: should be set to SATA.
3. Cache mode set to None, and Discard mode is set to Unmap.
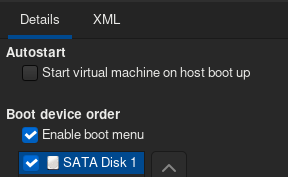
Don't forget to enable it as your primary boot drive.
Adding Offline installation Media
This section will be appropriately filled out once the Offline installation portion of the Docs is complete, as earlier mentions of this sections are also incomplete, this doesn’t make sense to fill out just yet. If you do end up doing an offline installation and want to add your media, simply add it as SATA CD-ROM and boot it via OpenCore. Otherwise, try using the USB option for weirder disk images. I’ve found this method can be a bit unreliable, and luckily you can use recoveryOS.
If you did not create a Macintosh disk image earlier using DiskProvision, create it now using the Virtual Machine Manager GUI to have a disk to install the OS on to.
Creating a disk image for installation
If you’re looking to passthrough a physical drive on your system to act as the main storage for the Virtual Machine, substitute this section. Requires macOS compatible SSD/NVMe Hardware.
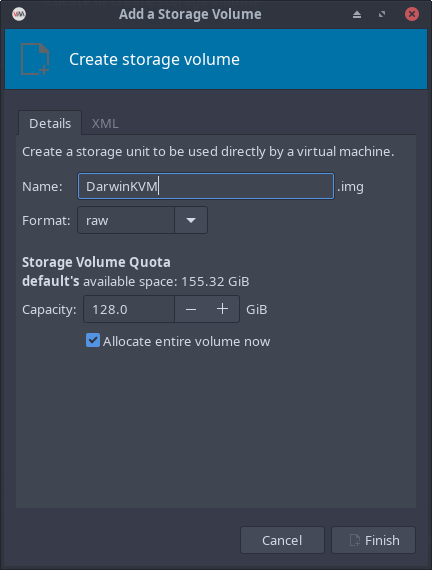
To create a virtual disk image, when selecting the "Add Hardware" button to bring up the Storage prompt, there is a + button in the current libvirt images directory. You can choose any size you'd like but I suggest the standard 128G, 256GB, 512GB, 1024GB.
You are now ready to configure the NIC. Head over to the next page for OS specific options!