Now that you have an OpenCore disk image, and a Macintosh disk image (if you're not doing NVMe Passthrough). You still need a machine to add these disks onto, and boot. To do that, you'll need to add DarwinKVM to your Virtual Machine Manager.
Placeholder Image
To begin, we need to go over how to actually source the XML definition. DarwinKVM provides two ways to do this. You can either, scroll to the bottom of this page and use the example XMLs to create and import your own... or you can use DarwinKVMs Dynamic XML to gather various information about the system, and automatically apply them to the XML template given by Virtual Machine Manager. This is essentially the same thing as choosing to create a new Virtual Machine in the GUI, and walking through the steps there. DarwinKVM also comes with an Importer tool which will quickly allow you to import the XMLs you define from the system on the fly.
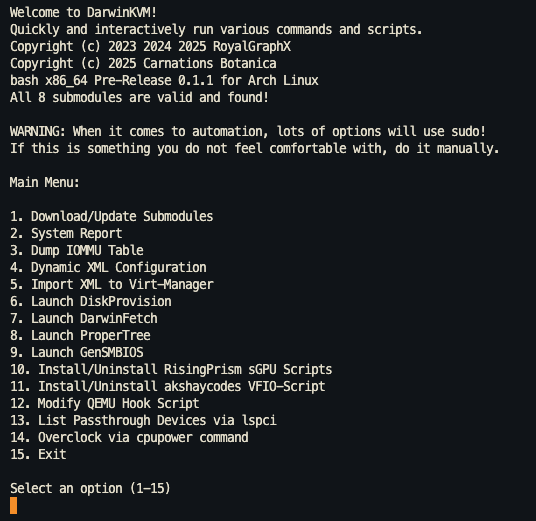
To use the Dynamic XML configuration, use 4 on the Main Menu.
To explain what's happening under the hood and for your later understanding of XML modification within Virt-Manager itself, you'll need to understand the different sections of the XML.
We'll start off with the top header section that can be seen written like so:
<domain type='kvm' xmlns:qemu='http://libvirt.org/schemas/domain/qemu/1.0'>
  <name>DarwinKVM (MacPro7,1)</name>
  <description>This virtual machine is a DarwinKVM MacPro7,1 using Cascadelake-Server.</description>
  <uuid>c44e7384-bc74-4d3e-b6ce-5a6148296fe8</uuid>
  <memory unit='KiB'>8388608</memory>
  <currentMemory unit='KiB'>8388608</currentMemory>
  <memoryBacking>
    <nosharepages/>
  </memoryBacking>
  <vcpu placement='static'>8</vcpu>
  <os firmware='efi'>
    <type arch='x86_64' machine='q35'>hvm</type>
    <loader readonly='yes' type='pflash'>/usr/share/edk2/x64/OVMF_CODE.4m.fd</loader>
    <nvram template='/usr/share/edk2/x64/OVMF_VARS.4m.fd'>/var/lib/libvirt/qemu/nvram/DarwinKVM_VARS.4m.fd</nvram>
    <boot dev="hd"/>
    <bootmenu enable='yes'/>
  </os>
This section describes a lot of the basic elements of the Virtual Machine, such as its name, and description for VMM and actual definition data like the amount of RAM in KiB, the amount of vCPUs total, and the UEFI firmware floppy disks defined and boot priority is set.
The main problem with the above section is that depending on your distribution, the path of loader can vary. Some machines, also don't have enough host threads to allocate an 8 vCPU machine. This can already cause issues trying to import this XML on a potential users machine.
To remedy this, we essentially check the common paths of OVMF and if they exist on your system, that path is saved and used. To calculate the proper amount of vCPUs the host machine can safely allocate, while still being able to boot XNU with correct topology we check the host Threads and select the best/closest matching amount is best.
This is important for the following section that happens later on in the XML:
  <cpu mode='host-passthrough' check='none' migratable='on'>
    <topology sockets='1' dies='1' cores='4' threads='2'/>
    <cache mode='passthrough'/>
  </cpu>
The above section requires the correct topology that sums to the total value in the previous snippet. XNU can only boot on specific topologies. To ensure that multi-threading is working on AMD platforms, we also must append the following to the above section:
<feature policy='require' name='topoext'/>
This tells Virt-Manager to apply the +topoext CPU flag to the CPUID overlay. This essentially ensures that the guest CPU is properly multi-threaded on AMD hosts. That is how we take care of properly having the correct section mentioned above.
This may or may not be implemented at the time of reading, but the following path for defining the QEMU binary to use, is also to be checked against common paths and set to ensure a successful XML import.
  <devices>
    <emulator>/usr/bin/qemu-system-x86_64</emulator>
    <watchdog model='itco' action='none'/>
    <memballoon model='none'/>
  </devices>
Finally, we arrive to the XML portion that lets us manually control the QEMU flags passed:
  <qemu:commandline>
    <qemu:arg value='-global'/>
    <qemu:arg value='ICH9-LPC.acpi-pci-hotplug-with-bridge-support=off'/>
    <qemu:arg value='-device'/>
    <qemu:arg value='isa-applesmc,osk=ourhardworkbythesewordsguardedpleasedontsteal(c)AppleComputerInc'/>
    <qemu:arg value='-usb'/>
    <qemu:arg value='-device'/>
    <qemu:arg value='usb-tablet'/>
    <qemu:arg value='-device'/>
    <qemu:arg value='usb-kbd'/>
    <qemu:arg value='-cpu'/>
    <qemu:arg value='Cascadelake-Server,vendor=GenuineIntel'/>
  </qemu:commandline>
When using QEMU 6.1+, you must ensure that ACPI PCI Hotplug with Bridge support is disabled. You can get around this by using an older QEMU machine version, but this is a very simple fix and is added automatically by Dynamic XML. Secondarily we also add a new device to the guest. The Apple SMC device emulated by QEMU can provide an SMC chip, that the Darwin kernel can see and try to read/write to/from. Sometime during the boot process, a kernel extension known as Don't Steal Mac OS.kext will ask the SMC chip for a passphrase. This passphrase has been used in public court documents, and while Apple has tried to pass this off as a trade secret it remains used freely online at the descretion that this changes at any moment and we can no longer include this and you must source the OSK yourself.
To top it all off, even if you are on a newer or older Intel platform, and lucky for you if you're on AMD at all, we automatically set the CPUID overlay that QEMU can provide to the same Intel CPU architecture that of the Mac Pro model you intend to use. This can be a Cascadelake Xeon CPU on the newer MacPro7,1 or as old as a Conroe based CPU for MacPro4,1. This is decided by you, when choosing the type of DarwinKVM XML template you need to use.
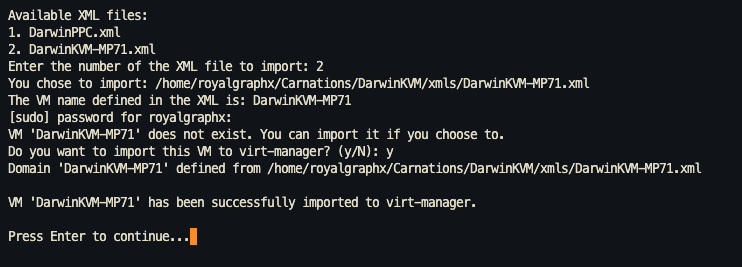
Below, is a screenshot of the work that Dynamic XML has done up until this point. You will not see output like the following, but for learning, this is nice to see.
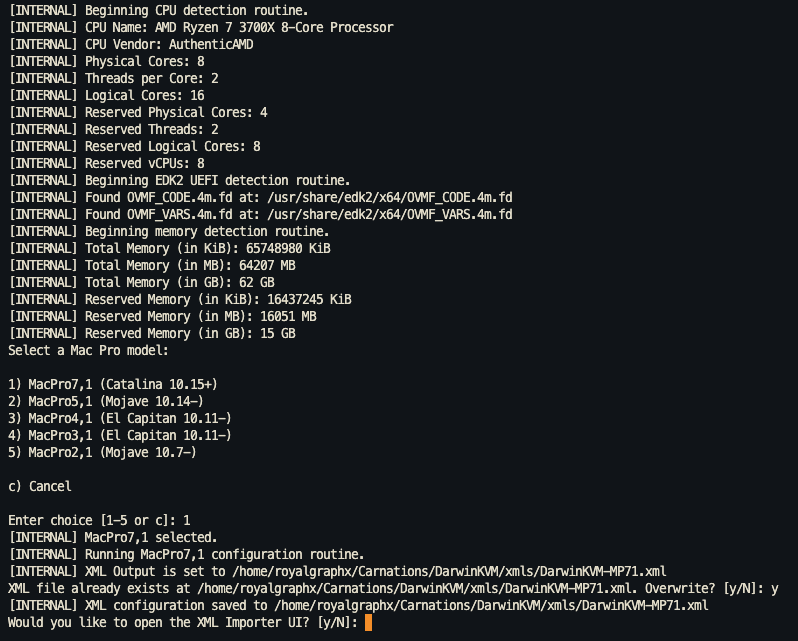
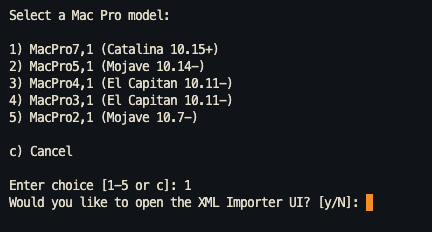
Once you select the Mac Pro model, you will be asked if you are ready to import the XML. It will be created on the fly by DarwinKVM and ready to be used shortly after. You can now say Yes, and choose the XML that has just been created and appears on your menu.
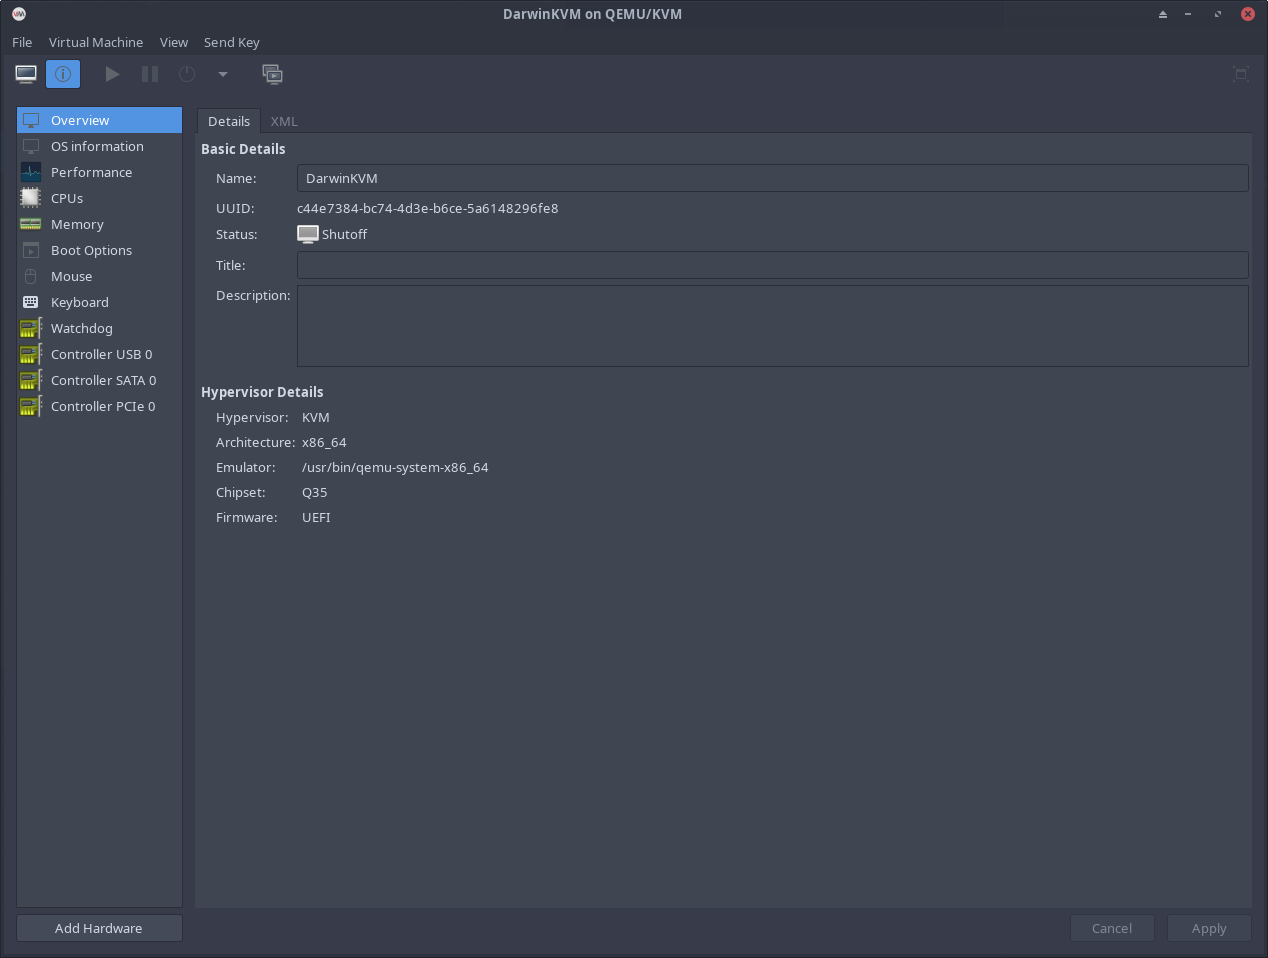
Placeholder Image of Virt-Manager showing the new VM
You are now ready to finish configuring the rest of the machine in Virt-Manager itself. Please double click the DarwinKVM machine you just imported, to open the Details window.